Good Morning All and a very Happy Wednesday!
Well, here's today's offering for the Creative Studios Blog.
For this card I've used the Robin and Wreath Singles Stamps as well as the A6 Mistletoe Background Stamp.
As always, I've put the full instructions with photos on the Creative Studios site.
Although I've painted the bird as a Robin, you could use this stamp all year round by changing the colours.
Anyway, apologies for a flying visit today! I'll be back next Tuesday with a project for Creative Expressions.
Many thanks for visiting and leaving comments.
Good Morning All and a very Happy Tuesday!
I'm still playing with the new range of Singles stamps from Creative Expressions and today I'm using the Anemone stamp.
Start by inking up the stamp with Black Archival Ink. Heat emboss with Cosmic Shimmer Clear Powder. Do this 3 times.
Paint with Cosmic Shimmer Drawing Inks in the following colours: Lime Burst, Magenta Flame and Rich Gold.
Water down the Rich Gold to paint the background to the flowers.
Cover one of the stamped images with Creative Expressions Double Sided Adhesive. Apply Cosmic Shimmer Diamond Sprinkles Glitter Jewels.
Matt and layer all 3 panels.
Cut a piece of Coconut White Card for the background and stamp the "Happy Days" sentiment across the bottom with Black Archival Ink.
Dry emboss with the Spellbinders M-Bossabilities Dainty Dots Folder.
From a piece of pink card, die cut a strip using the Spellbinders Classic Triple Scallop. Turn the card around and repeat so that it looks like flowers.
Cut a piece of green card to size. Cover with double sided adhesive and apply the Diamond Sprinkles.
Matt and layer then glue onto the white background.
Add the 3 stamped images with 3d foam pads.
And there's the finished card!
I know that a lot of the pink and green strip is covered up but it looks more interesting than a plain border going across. And as they say, "The Devil is in the Detail"!
Well, that's it for today. The next Crafty Sunday is on 7th September so I hope some of you will be able to make it.
Many thanks for stopping by and leaving comments.
Good Morning All and a very Happy Wednesday!
Just a quick posting today with a photo of a card I've made for the Creative Studios blog.
I've used the Partridge Singles stamp and also the Tree stamp. Both are available from the Creative Studios Shop.
As always, I've posted the full instructions with photos over on Creative Studios.
I hope you like it!
Many thanks for visiting and leaving comments and I'll be back on Tuesday with a project for Creative Expressions.
Good Morning All and a very Happy Tuesday!
Today, I've made a card using the Sunflower Singles stamp from Creative Expression. A perfect flower for all of those hot sunny days we've had.
Ink up the Sunflower with Black Archival Ink and stamp onto Coconut White Card.
Paint the flower using Tattered Rose, Peeled Paint and Wild Honey Distress Inks.
Trim to size and cover with Creative Expressions Double Sided Adhesive. Apply Micro Beads.
Emboss a piece of white card using the Creative Expressions A4 Art Deco Fanfare Embossing Folder.
Matt and layer.
Randomly stamp small sections of the A6 Fern Background Stamp onto Coconut White Card using Peeled Paint Distress Ink.
Spritz with water and allow the colour to bleed. Dry thoroughly.
Emboss the card using the same folder as before.
Highlight the raised areas with Wild Honey and Peeled Paint Distress Inks.
Distress the edges with Peeled Paint. Matt and layer onto black card.
Using the Spellbinders Finishing Touches Filigree 3d Bow Die, cut out the strip from White Card. Matt and layer onto black card. Glue onto the background.
Stamp the sentiment using Black Archival Ink.
Die cut with Spellbinders Scalloped Ovals Large Dies. With the die still in place, distress the card.
Cut a larger oval from black card. Matt and layer.
Attach the sentiment and the Sunflower to the card with 3d foam pads.
And there's the finished card!
Don't be alarmed if the background looks a bit messy if you try this technique....it all seems to come together in the end!
Well, that's it for today.
Many thanks for visiting and leaving comments.
I'll be back in the morning with a Christmas card for Creative Studios, hope to see you then.
Welcome to the Creative Expressions August 2014 Blog Hop! Hopefully, you got here from Kerry Hickton's Blog but, if you didn't, here's the start at the Creative Expressions News Blog! http://blog.creative-expressions.uk.com/2014/08/its-blog-hop-time-let-fun-commence.html
These new Christmas designs from the Singles Range at Creative Expressions include seven different stamps. as you will see from the samples made from the Blog Hop, they do not have to be used as they are but can be altered and interchanged to give lots of different options.
One randomly selected person commenting on this blog post before the closing date will win the following fabulous prize, which includes some of the new stamp designs.
For my project, I used the Believe stamp and here's my project with step by step instructions.......
Apply Cosmic Shimmer Flake and Glitter Glue to the stamp and stamp it onto Foundations Black Cardstock.
Using Cosmic Shimmer Polished Silk Glitters, apply the following colours one at a time: Silver Chrome, Golden Sand and Sahara Gold.
Sprinkle them randomly (I find that a very small spoon works best).
Trim to the size required. Add double sided tape around the 4 edges and sprinkle the 3 colours of glitter as before.
Matt and layer onto Vintage Gold and Black Foundations Cardstock.
For the background...........
Apply Flake and Glitter Glue to the small Christmas Tree from the Christmas Tree set of 4 trees. Stamp it 5 times across the bottom of a piece of Black Card.
Sprinkle the same glitters as before over the trees.
Glue the "Believe" panel into position.
And there's the finished card....a great one for a man who we know are so difficult to make for! I hope you like it!
Thank you for visiting my blog, please leave a comment below in order to be in with a chance of winning a prize!
Once you have done that, you will need to click here to visit Creative Expressions News Blog for a final project.
http://blog.creative-expressions.uk.com/2014/08/creative-expressions-august-2014-blog.html
I am the final person on the list but if you've missed anyone here is a list for the Blog Hop:-
1. Sue Wilson
http://particraft.blogspot.com/2014/08/creative-expressions-august-2014-blog.html
2. Julia Watts
http://inkyfingerzone.blogspot.com/2014/08/creative-expressions-august-2014-blog.html
3. Tracey Laughton
http://creativetracey.blogspot.com/2014/08/creative-expressions-august-2014.html
4. Kim Bacon
http://kimzkrafts.blogspot.com/2014/08/creative-expressions-august-2014-blog.html
5. Donna Ratcliff
http://donnaslittlecraftycorner.blogspot.com/2014/08/time-for-another-blog-hop.html
6. Neil Burley
http://perfectly4med.co.uk/2014/08/15/ce-august-blog-hop/
7. Tracy Heaton
http://ahintofmagnolia.blogspot.com/2014/08/let-it-snow-let-it-snow-let-it-snow.html
8. Kerry Hickton
http://kezzyscraftyjourney.blogspot.com/2014/08/creative-expressions-blog-hop-fun.html
9. Pam Smith (you are here)
10. Creative Expressions
http://blog.creative-expressions.uk.com/2014/08/creative-expressions-august-2014-blog.html
Start page, prize details and how to take part: Creative Expressions News Blog. The blog hop started on 15th August at 06.00am and ends 19th August at 5pm.
Thank you for taking part in our Blog Hop - good luck!
Good Morning All and a very Happy Wednesday.
Today is my Creative Studios Project Day and I thought I'd get away from cards and make a decoration for the Christmas Tree. It would also make a nice wall decoration.
I've used the small Poinsettia from the Festive Wreath Singles stamps designed by Sam Poole for this.
As always, the full step by step is on the Creative Studios blog so I do hope you'll visit there and take a look.
The flowers were very easy to cut out so it didn't take too long to make.
I hope you like it! Many thanks for visiting and leaving comments.
The workshop for the 6th September is sold out but there are a few spaces on the 27th.
Until next time, have a happy, crafty week.
Good Morning All and a very Happy Tuesday!
Yes, I know, Cala Lillies are traditionally associated with funerals but I love them! I'd fill my house with them if I could afford it. I love the smell and the shape of them, well just about everything about them!!
Anyway, that's brought me to today's project....I think it has a real Springtime feel to it. So, let's get started....
Stencil through the Leafy mask onto Coconut White Card with Citrus Adirondack Ink.
Ink up the Cala Lily Singles Stamp with Black Archival Ink and stamp onto Coconut White card. Paint the Lily with Sunshine Yellow, Citrus and Sunset Orange Adirondack Inks. Matt and layer onto Yellow and Green card.
Distress around the edges of the background card with Citrus Ink and emboss using the Creative Expressions Quilted Flower A4 Folder. Matt and layer onto Yellow Card.
Colour a piece of White Seam Binding with the Citrus Ink and attach it to the card. Add the Lillies with 3d foam pads.
Colour 3 more pieces of Seam Binding with the same inks that the Lillies were painted with. Knot them around the piece of green ribbon.
Stamp the sentiment with Black Archival Ink then matt and layer, Shape the card and attach it with glue and 3d foam pads.
And there's the finished card. Hope you like it. Of course, the stamp would be ideal for a Sympathy card but I've always liked to be different!
Well, that's it for this week. Many thanks for stopping by and leaving comments. Until next time, have a great week.
Good Morning All, it's Wednesday and that means I have a project using one of the stamps from the Very talented Sam Poole at Creative Studios to show you.
I've used Prickles the Hedgehog for this one...he is just so cute that I had to use him more than once on a card!!
I've put the full "how to" on the Creative Studios Blog so please visit there for the instructions.
I think you'll have to agree though, that he is gorgeous!
Anyway, that's it for today, just a short posting.
Many thanks for visiting and I'll be back next week with more ideas for Xmas!
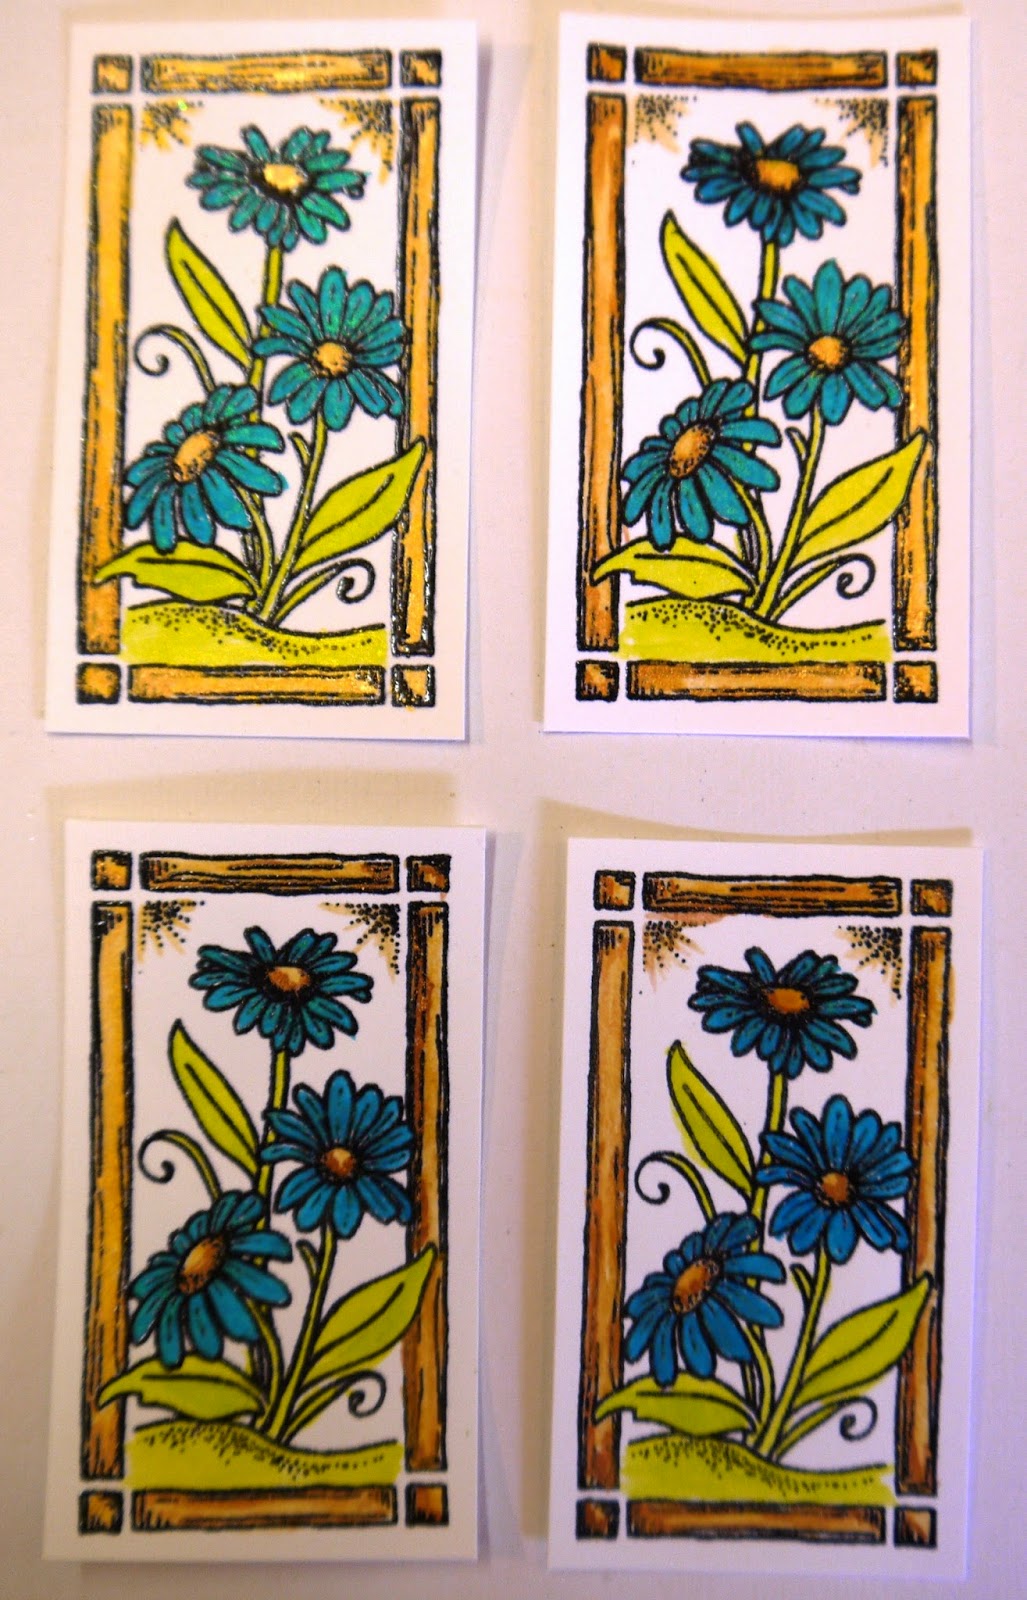
Good Morning All and a very happy Tuesday. Not only is it Tuesday but it's my first posting this month which means that there are some gorgeous new stamps to show you from Creative Expressions!
I thought I'd make something cheerful for my desk this week and found an MDF Pen Pot Holder that I bought ages ago but had left languishing at the back of a cupboard! So here goes!
Paint the holder with Cosmic Shimmer Warm White Matt Chalk Paint.
Stamp the flowers 4 times onto Coconut White Card with Black Archival Ink and heat emboss with Cosmic Shimmer Clear Powder.
Paint with Cosmic Shimmer Drawing Inks in the following colours:
Lime Burst, Peacock Teal, Rich Gold and Ancient Copper.
Trim to size.
Cut some Coconut White Card to fit the 4 sides of the pen holder.
Stamp the sentiment "Happy Days" across all 4 pieces of card. Paint the 1st letters of each word with the drawing Inks.
Put some of the Peacock Teal Drawing Ink onto a craft sheet and water it down before painting around the edges of the card.
Glue onto the pen holder with Cosmic Shimmer Dries Clear Glue.
Paint the edges of the pot and a section of the base with Cosmic Shimmer Midnight Matt Chalk Paint.
Glue the stamped panels into place with Cosmic Shimmer Dries Clear Glue.
And that's the finished project!
It's going to look fab on my desk with all of my essentials in it!!
I do hope you like it. I'll be back next week using another stamp from the range. I'll also be posting tomorrow with a card using the new Xmas stamps from Sam Poole at Creative Studios so I hope you'll visit and see what I've come up with!
Many thanks for dropping by today and until next time....keep crafting!